Overview
For my module Electronics and Interfacing at University, I was tasked with creating a timer with a large NeoPixel 7-segment display to track a runner, I added additional functionality using RFID and serial-communication to create a client app.Project
For the coursework, we were given the brief of:
“An ultra-distance cross country running event is normally run over a distance of above 30 miles (50km). Runners navigate a long distance course over many hours. The runners have to record their arrival at multiple checkpoints … record and make timing data retrievable”
Electronics Design
For this, I knew that I needed to build a way to record when each user was going to reach a checkpoint so I used an RFID reader and some RFID tags to test.
I wired the circuit to my Arduino, also wiring up the NeoPixels to external power supply as the current required for them is way higher than what the Arduino can deliver (Arduino out: 0.9A whereas the large NeoPixel board needed up to 5.2A).
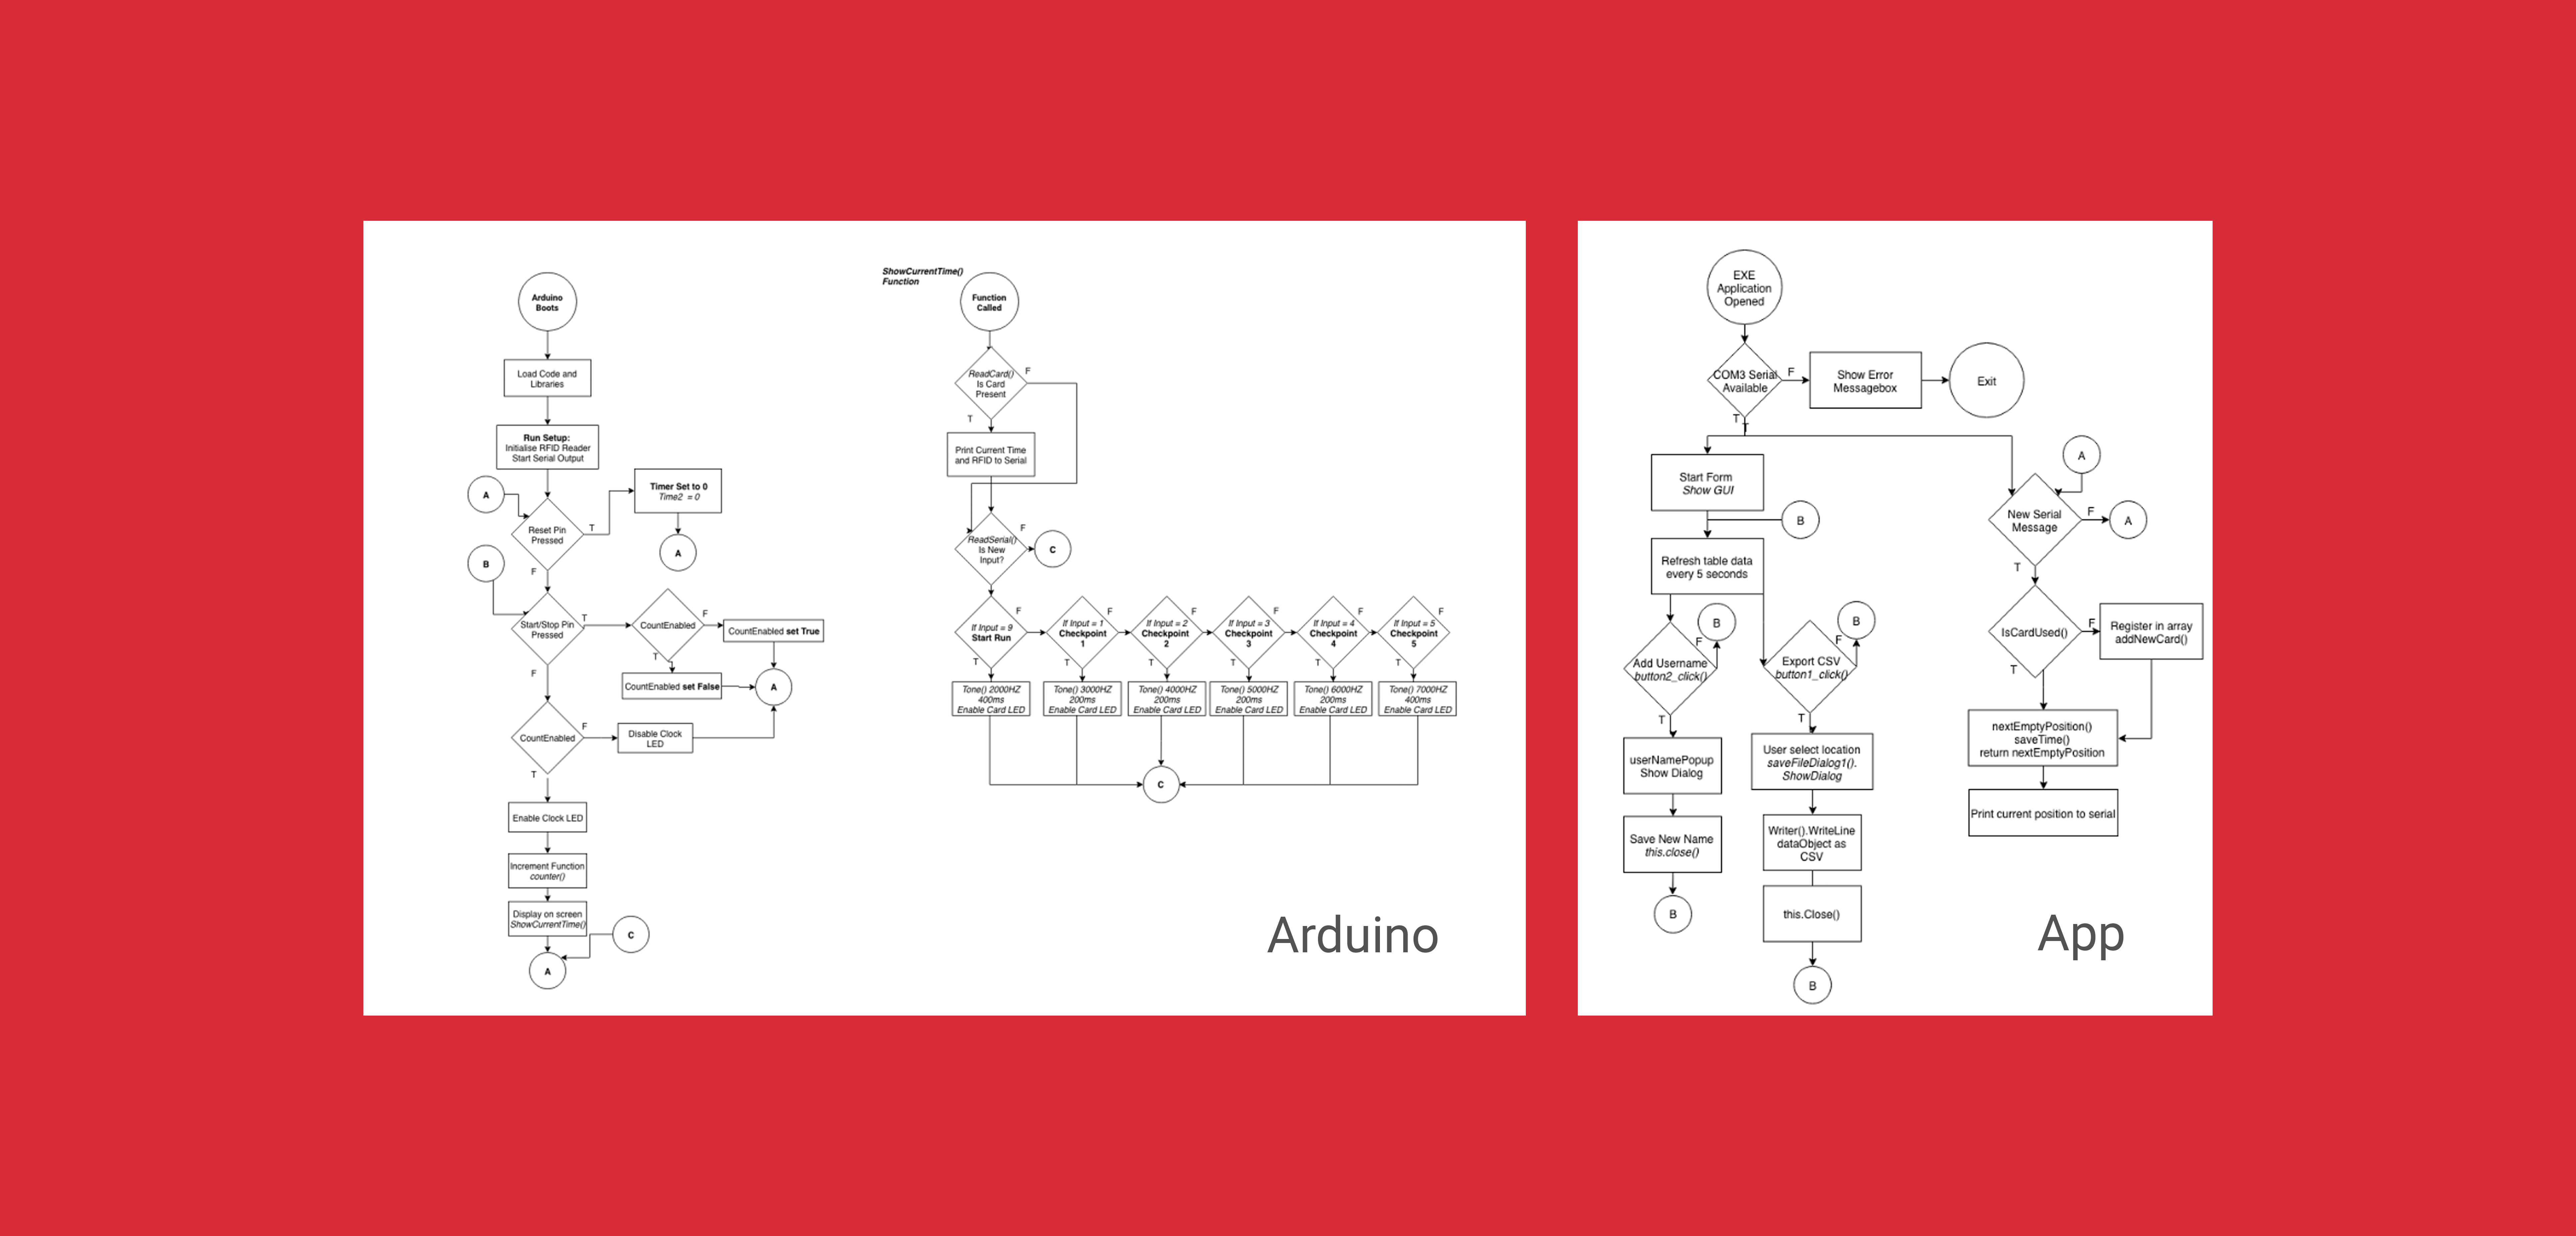
In the later designs I added a buzzer and a second LED which is triggered when a ‘success’ serial response is sent back from the desktop app that the card has been read and recorded to give both visual and audio feedback to the user, as serial can sometimes be unreliable (especially on Arduino) and this would provide an extra level of validation.
Software Design
In the earlier version of the software, there was no desktop app integration, the C# app was needed for historic data persistance through serial. The main roles of the built-in Arduino software are to handle the 7-segment display’s time, allowing the timer to be started, stopped or reset and if a card is present, passing the value of it and time to record on the desktop app.
The desktop app will send a message saying the checkpoint the user is at and the Arduino will then flash an LED and play a sound of that frequency to give audio feedback that the card has been read.
Tools used
- C# for the desktop application (really nice I/O libraries)
- WPF for the desktop application interface
- Arduino with C code for time tracker
Concluding
I really enjoyed this project, being my favourite project this year in my University course because of the freedom to scope out and create a working product with both hardware and software, it’s a really fun and interesting experience.
I’m happy with the product that I created within the limited timeframe, but if I had built this for deployment, I would probably use ESP8266 modules to communicate back race positions wirelessly, and use MQTT for messaging which would scale for more devices better.
UltraRun's code was created for an assignment for the University of Hull and as a result cannot be published publicly online.
University of Hull Logo, Symbols and Iconography all rights reserved hull.ac.uk, used for illustrative purposes and do not imply endorsement.

